Snowflake Ornaments
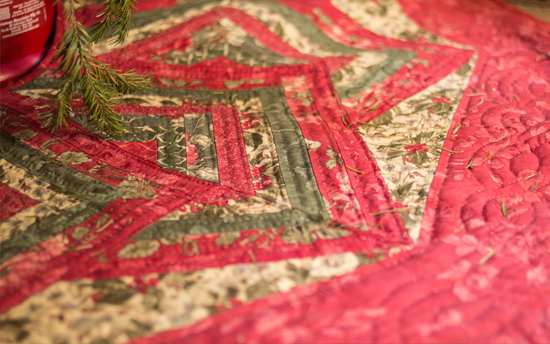
It’s funny, being torn in so many ways between two countries. Some things are hard, like having to remember to spell colour with a u, and some things are great, like celebrating Thanksgiving twice! Actually, Aaron and I celebrated three times this year. First Canadian Thanksgiving with his family, then with our dear friends, R & J and the girls, and finally American Thanksgiving with some of my family. Mom, my sister, and one brother came to stay with us for about a week and we had a delightful time, though I felt bad that they arrived just in time to see it snow a foot in a night! They’re good sports, fortunately. We had a blast! We convinced them to try sushi (went well!) played many, many, many games (lots of Settlers of Catan!), and enjoyed a feast every day (not just Thanksgiving dinner!). We even got in a little crafting. That’s what I’m so excited to show you. My mom found this pattern for an ornament and we made two together. They beautifully coordinate with the tree skirt she hand-made for us this year.
I made a third one later so I could give you a full tutorial. They’re actually very simple, and so pretty! Many variations you could do. For 1 basic snowflake, you will need:
2 pieces of cardstock, (each 3×6″)
4 pieces of fusible interfacing (each 3×6″)
2 pieces of fabric A (each 3×6″)
2 pieces of fabric B (each 3×6″)
iron & ironing board
scissors and/or rotary cutter
ruler
pen
super glue
binder clips
Chosen Fabric:

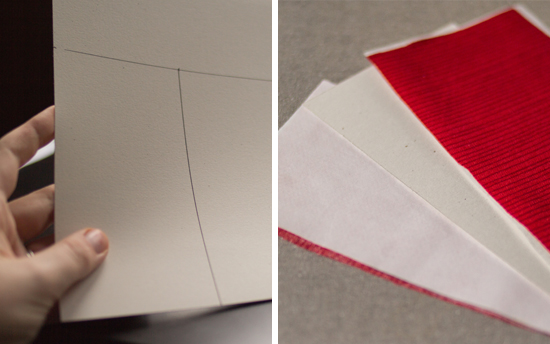
1. Fuse the fabric to the interfacing
Your fusible interfacing should have one side with glue, and one side with a paper backing. Place the glue side against your first piece of fabric. Align them carefully and flip them so the paper backing is up – that’s what your iron will be touching. Iron (on silk setting) for 3-5 seconds. Check the edges to make sure the glue bonded, then peel off the paper backing. Do this with each of your fabric pieces and interfacing.
2. Fuse the fabric to the cardstock
Now your fabric has glue (interfacing) on its wrong side. Place your cardstock on top of it, against the glue. Put your iron against the fabric and iron for 4-6 seconds, making sure it adheres. Now on the cardstock side, use the same fabric (2nd piece) and adhere it as well. Do the same with fabric B. You will have two stiff pieces of double-sided fabric, essentially. A fabric A piece, and a fabric B piece.
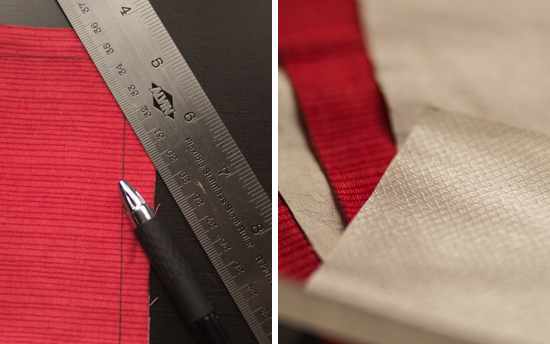
3. Cut into strips
Trim any rough edges on your fabric pieces. Then mark them with a pen and ruler so you have 6 strips, each 1/2 inch wide. If it’s not exact, don’t worry! It will come out fine. Feel free to make them thinner, or make them longer and thicker if you want a bigger one.

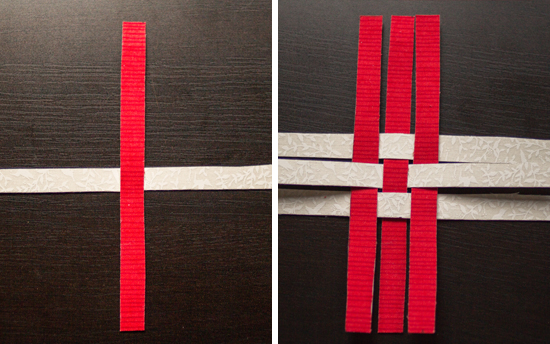
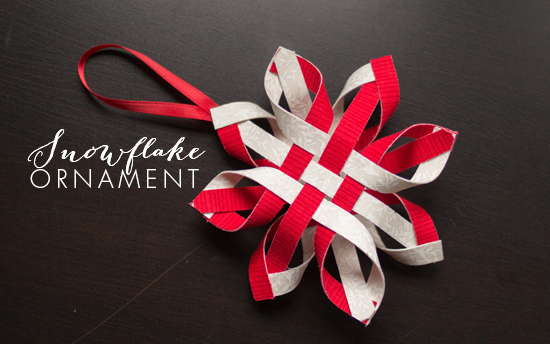
4. Start weaving
You’re going to make two separate sides, and then glue them together. For each side, you will need three strips of fabric A, and three strips of fabric B. Place one strip of each in a cross, and glue them together where they intersect. Now weave in the other strips as shown, gluing at each intersection. Do this for both sides of your snowflake. If you need an extra hand, use binder clips to hold them together while the glue dries.
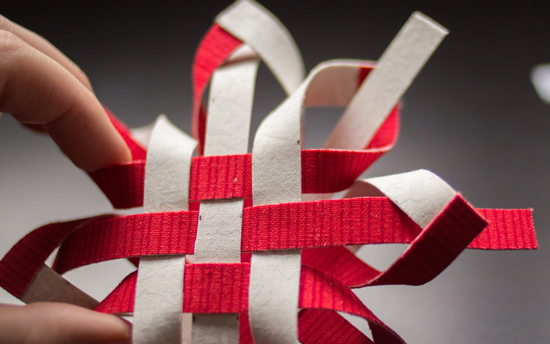
5. Making the snowflake
Place one side on top of the other. I hope you’re a pictures person like me, because there’s not a better way to describe it! Look at the photo and you should see how it weaves together. Use the binder clips to hold while the glue dries. Trim the edges of your strips so they come to a point. Make sure you sneak the ribbon for the ornament in between one of the sections, or else glue or sew it on later.


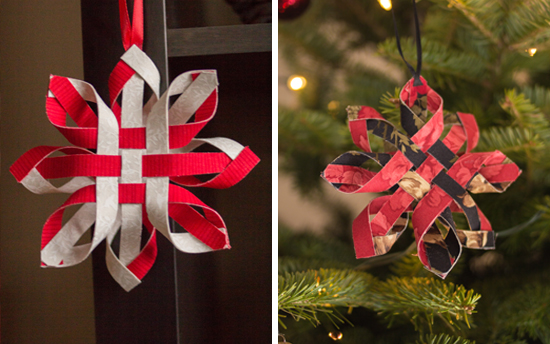
6. Hang it up
Once it’s all dry (10 minutes max) your snowflake ornament is ready! I’ve discovered that the holes in each point of the snowflake are very open, making this the perfect tree topper! I’m going to make a larger one with more strips and only white fabric and top my tree with it. I’ll try to post the photo soon. Have fun with these!!!
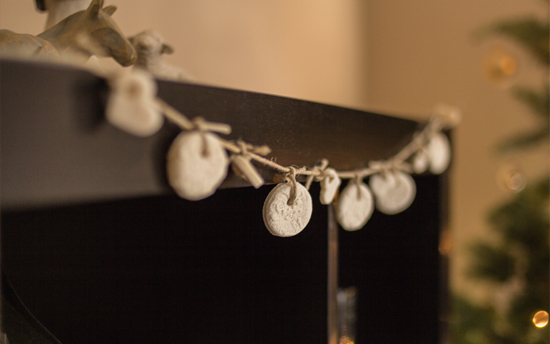
Some of our other handmade Christmas decorations:

The beautiful quilted tree skirt my mother made for us!
Emily Kingswood -
That tree skirt is so pretty and those handmade decorations!! How did you make them?
Laura -
Thanks, Emily! The decorations are made out of salt dough. You basically make whatever you like as if they were sugar cookies. But don’t eat them! (Unfortunately one of Aaron’s friends made that mistake once….oops!) You can stamp them or do cutouts, whatever you like. They take a few days, sometimes a week to dry out and get hard.